Nothing like the irresistible smell of freshly baked chocolate chip cookies wafting through the house. Nestlé has been a household name in baking for decades, and its chocolate chips have become a staple in kitchens worldwide. Whether you’re a seasoned baker or just starting, the Nestlé chocolate chip cookie recipe is a timeless classic that never disappoints.
What makes this recipe stand out from the rest? It’s all about the perfect balance of flavours and textures. This Nestlé chocolate chip cookie recipe guarantees soft, chewy, and utterly delicious cookies every time you bake them. Premium Nestlé chocolate chips ensure each bite with rich, melt-in-your-mouth chocolate goodness. Plus, it’s incredibly easy to make, requiring just a handful of simple ingredients you probably already have in your kitchen.
This recipe is a breeze even if you’re a beginner baker. It walks you through each step, offering tips and tricks to help you avoid common baking mistakes. And for experienced bakers, it provides a foolproof way to whip up the best chocolate chip cookies with minimal effort. Whether baking for a special occasion or craving a sweet treat, this recipe will become your go-to.
So, grab your mixing bowl, preheat the oven, and prepare to bake the best Nestlé chocolate chip cookies you’ll ever taste!
Table of Contents
Ingredients You Need for the Perfect Nestlé Chocolate Chip Cookies
Baking the perfect Nestlé chocolate chip cookies isn’t just about following a recipe—it’s about choosing the right ingredients to create the ideal balance of flavour and texture. Each element in the recipe contributes something unique, ensuring every bite of your cookies is rich, soft, and utterly satisfying. Let’s explore the essential ingredients that will help you make the best chocolate chip cookies imaginable.
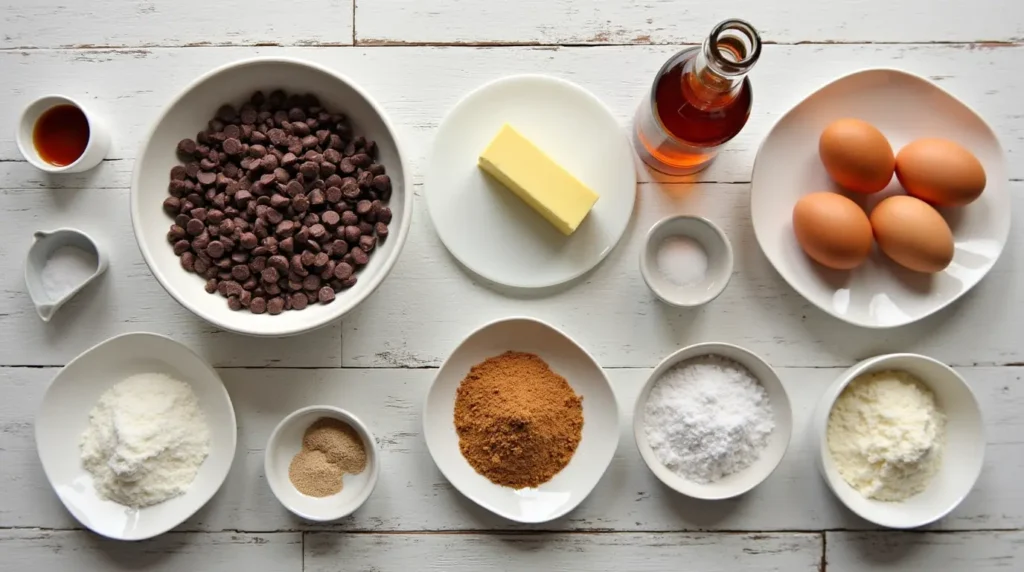
Nestlé Chocolate Chips: The Choice for the Best Flavor
The quality of the chocolate chips you use is critical for chocolate chip cookies. Nestlé chocolate chips are the gold standard in many households, and for good reason. Known for their smooth texture, rich taste, and high-quality cocoa, Nestlé chocolate chips are carefully crafted to provide an ideal balance of sweetness and cocoa depth.
- Smooth Melting and Rich Flavor: Nestlé’s chocolate chips are designed to hold their shape while baking, but they also melt into gooey pockets of chocolate, making them a perfect addition to your cookies. Their smooth texture allows for a perfect melt in every bite, adding richness and depth to your cookies.
- Variety for Every Taste: Nestlé offers a variety of chocolate chips to suit different preferences, including semi-sweet, milk, dark, and even white. Each variety has a slightly different taste profile. Semi-sweet chips are classic for their balance of sweetness and bitterness, while milk chocolate chips bring a smoother, sweeter flavour. Dark chocolate chips provide a more intense cocoa taste, perfect for those who prefer a more robust chocolate flavour.
Using Nestlé chocolate chips ensures that your cookies have the perfect chocolate-to-cookie ratio and a rich, indulgent taste in every bite.
Butter and Eggs: The Secret to Soft and Chewy Cookies
Butter and eggs are two key ingredients that help define the texture of Nestlé chocolate chip cookies. Together, they contribute to their softness, chewiness, and rich flavour. They also provide moisture, structure, and richness to the dough, creating that perfect melt-in-your-mouth consistency.
- Butter: The role of butter in your cookies cannot be overstated. Butter is responsible for making cookies soft, tender, and flavorful. Its high-fat content helps coat the flour particles in the dough, preventing too much gluten formation. This is important because gluten development can lead to more challenging, chewier cookies, whereas butter promotes a delicate, tender crumb. The flavour of butter is also crucial—it adds richness and depth, enhancing the chocolate’s sweetness and the vanilla in the dough. For the best results, use unsalted butter, which allows you to control the amount of salt in your dough.
- Eggs are another crucial ingredient that helps bind the dough and contribute to its texture. The egg yolks add moisture and richness, making the cookies soft and chewy. The egg whites provide structure and stability, helping the cookies hold their shape as they bake. Eggs also help the leavening process, allowing your cookies to rise slightly, creating a soft and tender bite.
Many bakers recommend adding an extra egg yolk to cookies for an even chewier texture. This increases the fat content, which can help create an even more prosperous, tender texture.
Vanilla Extract: Essential for Flavor
While it may seem like a simple ingredient, vanilla extract is a key player in creating the rich, full flavour of your Nestlé chocolate chip cookies. Vanilla provides a warm, aromatic note that enhances the other flavours in your dough, balancing the sweetness and highlighting the chocolate’s depth.
- Flavour Enhancer: Vanilla extract works subtly, bringing together all the flavours of the dough. It complements the chocolate chips, boosting the overall taste of the cookies. The cookies might taste flat without vanilla, but they develop a richer, more complex flavour with it.
- Quality Matters: For the best results, opt for pure vanilla extract rather than imitation vanilla. Pure vanilla extract contains real vanilla beans, providing a more nuanced, authentic flavour worth the extra cost. It’s a simple but effective way to elevate your cookie dough and make your cookies taste even better.
Sugar and Flour: The Foundation of Cookie Texture
No cookie recipe is complete without sugar and flour, which form the foundation of the dough and contribute to the texture and structure of the cookies. The right balance of these ingredients ensures that the cookies turn out soft, chewy, and ideally spread during baking.
- Sugar: Granulated and brown sugar are essential in your cookies. Granulated sugar helps the cookies spread during baking, creating that thin, crisp edge. It also contributes to the overall sweetness and texture. Brown sugar contains molasses and adds moisture and a slight caramel flavour. This is key to achieving that chewy, tender texture everyone loves in a chocolate chip cookie. Combining both sugars creates the perfect balance of crispness around the edges and softness in the centre. Add more brown sugar to your dough if you prefer an extra chewy cookie.
- Flour: All-purpose flour is the primary dry ingredient in your Nestlé chocolate chip cookie dough and is essential for creating the proper structure. Flour provides the necessary foundation for the cookies, giving them body and helping them hold together while baking. The key is to measure your flour correctly. Flour can lead to dry, crumbly cookies, while too little flour can result in cookies that spread too much and are too thin. For best results, spoon the flour into your measuring cup and level it off, or use a kitchen scale to measure it by weight. Additionally, flour works with the other ingredients to give the structure and texture of your cookies. A perfect balance of flour ensures that the cookies are soft but not too dense.
Each ingredient in the Nestlé chocolate chip cookie recipe serves an essential purpose, contributing to the perfect balance of flavour and texture. Nestlé chocolate chips provide the rich, smooth, chocolatey taste that makes these cookies a classic. Butter and eggs bring tenderness, moisture, and structure, while vanilla extract enhances and deepens the flavour. Finally, sugar and flour form the backbone of the dough, ensuring that your cookies have the right texture and consistency.
By using these high-quality ingredients and understanding their roles in the recipe, you’re setting yourself up for success in baking the most delicious, soft, and chewy Nestlé chocolate chip cookies ever.
Step-by-Step Guide to Making Nestlé Chocolate Chip Cookies
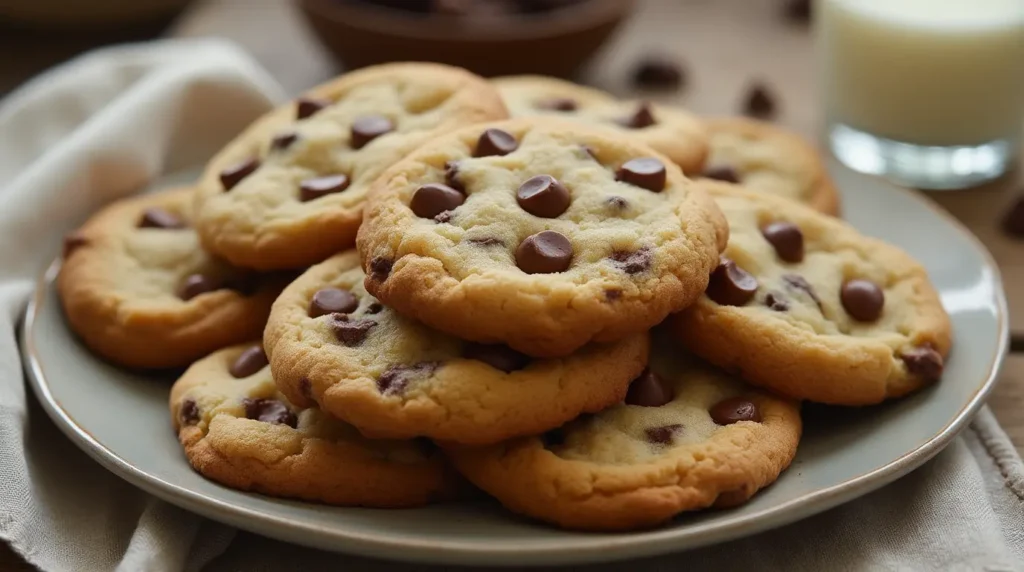
Baking the perfect Nestlé chocolate chip cookies doesn’t need to be complicated, but there are a few key steps to ensure you get the best possible results. From mixing the dough to incorporating the chocolate chips and resting the dough, each part of the process plays a crucial role in creating soft, chewy, and flavorful cookies. Follow this step-by-step guide for baking success!
Prepare the Cookie Dough: Mixing Wet and Dry Ingredients
The first step to making perfect Nestlé chocolate chip cookies is preparing the cookie dough. This involves combining the wet and dry ingredients separately before combining them.
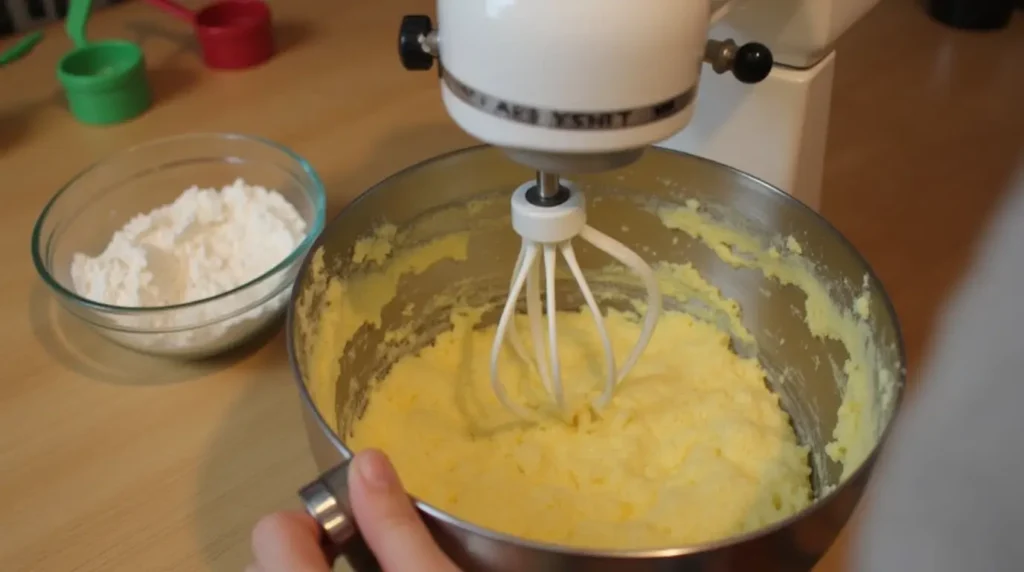
- Start with Softened Butter: Start by creaming the unsalted butter with granulated and brown sugar. This helps create a smooth, uniform dough with a light and airy texture. Use a medium-speed electric mixer to cream the butter and sugars together until the mixture is light and fluffy, which should take about 3-4 minutes. This process incorporates air into the dough, contributing to the cookies’ soft, chewy texture.
- Add the Wet Ingredients: Add eggs and vanilla extract once the butter and sugars are creamed. Mix until thoroughly combined. Adding the eggs one at a time is essential, beating well after each addition. This ensures the mixture is smooth and homogenous, which helps in achieving the perfect cookie texture.
- Mix the Dry Ingredients: In a separate bowl, whisk together the all-purpose flour, baking soda, and salt. This step ensures that the leavening agents (baking soda and salt) are evenly distributed throughout the flour, preventing pockets of unbalanced flavour or texture in your dough.
- Combine Wet and Dry Ingredients: Gradually add the dry mixture to the wet ingredients, mixing slowly to avoid flour flying out of the bowl. Stir the mixture using a spatula or the mixer at low speed until combined. Be careful not to overmix the dough, leading to tough cookies. You want a soft, slightly sticky dough that holds together well.
Incorporate the Chocolate Chips: Tips for Evenly Distributing the Chips in the Dough
Now comes the fun part: adding the Nestlé chocolate chips to your cookie dough! This is where you get to ensure that every bite will be packed with gooey, melty chocolate.
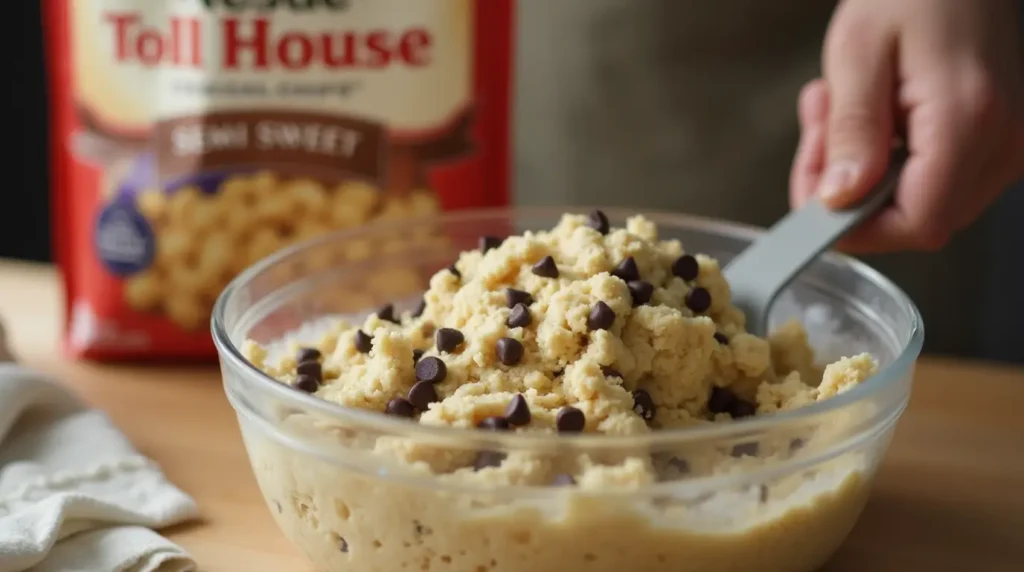
- Choose Your Chips: Nestlé offers a variety of chocolate chips, so choose the one that suits your preference—semi-sweet, milk chocolate, or dark chocolate. Some bakers also opt to mix different types of chips for an even more complex flavour.
- Gently Fold in the Chocolate Chips: Gently fold the chocolate chips into the dough using a spatula or a wooden spoon. Do not overwork the dough during this step, as doing so can make it challenging. The goal is to evenly distribute the chips throughout the dough to pack every cookie with chocolate goodness.
- Use a Light Hand: To ensure an even distribution, don’t just stir in a quick, hasty motion. Instead, fold the dough gently, ensuring the chocolate chips are incorporated without smashing them into the dough. The goal is to spread the chocolate chips evenly so each cookie bakes with a perfect balance of dough and chocolate in every bite.
Chill the Dough: Why Resting the Dough Leads to Better Cookies
While it might be tempting to scoop the dough and start baking immediately, chilling it is a crucial step leading to better-textured cookies. Allowing the dough to rest in the refrigerator for at least 30 minutes (or even up to 24 hours) enhances the flavour and texture of your cookies. Here’s why:
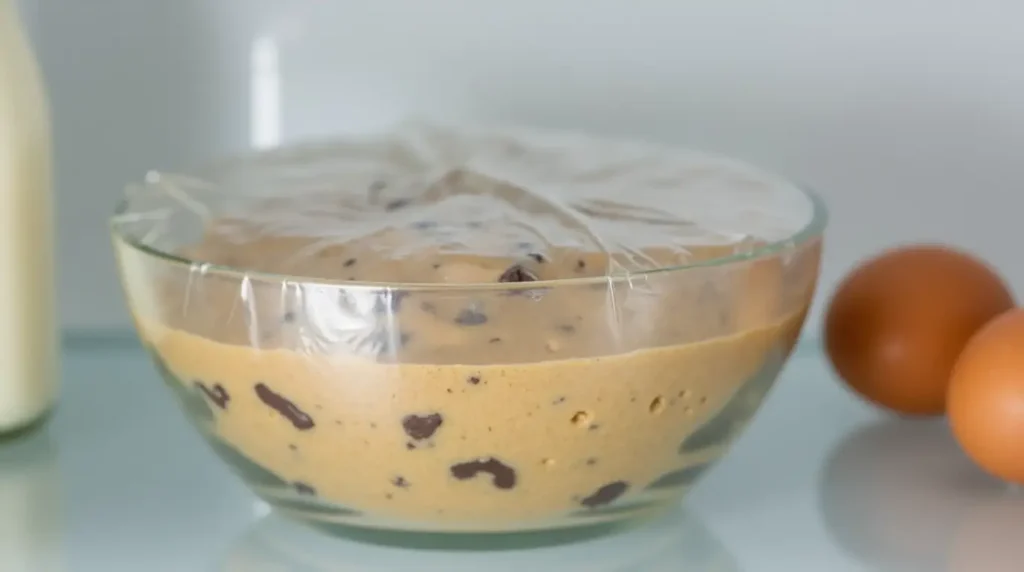
- Improves Flavor: Chilling the dough allows the flour to fully hydrate, giving the ingredients more time to meld together. This resting period enhances the overall flavour, making your cookies taste more prosperous and complex. The sugars also have more time to dissolve, resulting in a smoother, less gritty texture.
- Prevents Over-Spread: When you bake cookies immediately after mixing the dough, the fat (butter) is soft and prone to spreading too quickly in the oven. The butter firms up by chilling the dough, meaning the cookies will hold their shape better while baking. This prevents them from becoming too thin and ensures they bake with the right chewiness and height.
- Achieves Perfect Texture: Chilling the dough also helps control how the cookies spread as they bake. With chilled dough, the cookies maintain a thicker, chewier consistency. They bake evenly, and the texture is soft and tender without being too flat or dense.
- Convenience and Flexibility: Chilling the dough overnight is even better if you have the time. This extra rest time allows the dough’s flavour to develop fully, and you can bake the cookies the next day when you’re ready. If you’re short on time, 30 minutes in the fridge will still make a noticeable difference.
Optional: Scoop and Shape the Dough
While not strictly part of chilling, it’s worth mentioning that after the dough has chilled, it’s a good idea to use a cookie scoop or tablespoon to portion the dough into uniform balls. This will ensure that the cookies bake evenly and look neat. Roll the dough between your palms if you’d like a smoother surface for your cookies. Also, for a little extra flair, you can lightly press down on the dough balls before baking to encourage a more uniform shape or add a few extra chocolate chips on top of each cookie for visual appeal.
This step-by-step guide will help you make the perfect Nestlé chocolate chip cookies. Each step contributes to creating a cookie with just the right texture and flavour, from mixing the wet and dry ingredients to carefully incorporating the chocolate chips and allowing the dough to chill. These tips ensure your cookies are soft, chewy, and filled with rich, melty chocolate in every bite!
Tips for Achieving the Perfect Chewy Nestlé Chocolate Chip Cookies
Achieving the perfect chewy texture for your Nestlé chocolate chip cookies requires more than just the right ingredients and following the recipe’s steps. The baking process is crucial in determining how your cookies turn out. From the temperature of your oven to the tools you use and the timing of when you remove them from the oven, each detail can influence whether your cookies come out soft and chewy or dry and crispy. Here are some key tips to help you achieve those perfect, chewy cookies every time!
Bake at the Right Temperature: Importance of Oven Temperature in Cookie Texture
One of the most critical factors in achieving the perfect chewy texture in your cookies is baking them at the right temperature. Oven temperature directly impacts the texture and spread of your cookies, so getting it right is crucial.
- Preheat Your Oven: Ensure your oven is fully preheated before placing your cookies inside. This ensures that the dough starts baking immediately once it hits the hot surface, giving it a good initial rise and preventing over-spreading. Nestlé chocolate chip cookies are typically baked at 350°F (175°C), but always check the recipe for specific temperature instructions.
- The Effect of Heat on Chewy Cookies: Baking at the right temperature allows the butter to melt and the sugars to caramelize at the perfect rate. If your oven is too hot, the edges of the cookies will set too quickly, causing the centres to remain undercooked or overly soft. On the other hand, if your oven is too cool, the cookies will spread too much before they have time to set, leading to flat and overly crisp cookies.
- Use an Oven Thermometer: Even if the dial reads the same, oven temperatures can vary slightly from one unit to another. To ensure accuracy, consider using an oven thermometer to confirm that your oven is at the right temperature. This helps eliminate any guesswork, ensuring your cookies bake perfectly every time.
- Bake in the Middle Rack: Place your cookie sheet in the centre of the oven. This allows the heat to circulate evenly around the cookies, ensuring they bake evenly without burning on the bottom or edges.
Use Parchment Paper: Helps with Even Baking and Easy Removal of Cookies
Using parchment paper when baking your Nestlé chocolate chip cookies might seem like a small detail, but it can make a big difference in both the baking process and the final texture of your cookies.
- Promotes Even Baking: Parchment paper helps distribute heat evenly across the surface baking sheet’s surface. This ensures that the bottoms of your cookies don’t bake too quickly, which can lead to uneven texture. The paper also helps prevent direct contact between the cookie dough and the metal of the baking sheet, which could cause the cookies to burn on the bottom.
- Prevents Sticking: One of the most frustrating things when baking cookies is when they stick to the baking sheet, making them difficult to remove. Parchment paper eliminates this problem, as the cookies easily lift off the surface without sticking. This is especially important if you like to press your cookie dough down slightly or add extra chocolate chips or mix-ins that could make the cookies more delicate.
- Better Texture and Shape: Parchment paper can also help maintain the shape of the cookies. The cookies may spread unevenly without parchment, especially if the baking sheet is greasy or unevenly heated. Parchment helps maintain an even heat distribution, resulting in uniform cookies with a consistent texture.
- Convenience and Cleanup: Beyond baking, parchment paper makes cleanup a breeze. You won’t have to scrub your baking sheets after each batch, as the paper keeps the sheets clean and prevents baked-on cookie residue.
Don’t Overbake: The Key to Chewy Cookies is Taking Them Out While They’re Still Soft
Timing is everything when it comes to getting your cookies to be the perfect balance of chewy in the middle and slightly crisp around the edges. Overbaking is one of the most common mistakes leading to dry, crunchy cookies, so watching the clock closely is essential!
- The Perfect Timing: If your cookies look soft and undercooked in the middle, take them out of the oven. Cookies continue to bake on the baking sheet as they cool, so if you wait for them to appear fully baked in the oven, they’ll be overcooked once removed. For perfectly chewy cookies, pull them out when they are golden around the edges but still soft in the centre.
- The Cookie Set Rule: A good rule of thumb is to check your cookies around 9-11 minutes of baking time. This can vary depending on your oven and the size of your cookies, but the key is to watch the edges and look for just a slight golden hue. The centres should still appear soft and slightly puffy.
- Residual Heat: After removing your cookies from the oven, allow them to sit on the baking sheet for a few minutes. The residual heat from the sheet will continue to cook the cookies, so they’ll firm up slightly while retaining their chewiness. If you try to remove them from the sheet too soon, they may fall apart or seem too underdone.
- Size Matters: The larger the cookie dough ball, the longer it will need to bake. If you prefer more substantial cookies, adjust the baking time accordingly, but remember that they should be removed while still appearing soft in the centre.
Achieving the perfect chewy Nestlé chocolate chip cookies isn’t difficult, but it does require attention to detail. By ensuring your baking temperature, using parchment paper to promote even baking, and not overbaking your cookies, you can guarantee soft, chewy, and perfectly textured cookies every time. These minor adjustments will help you make cookies with a delightful balance of crisp edges and chewy centres, creating the ultimate chocolate chip cookie experience.
Troubleshooting Common Chocolate Chip Cookie Issues
Even with the best ingredients and techniques, baking cookies can sometimes go awry. Whether you end up with flat, dry, or unevenly baked cookies, understanding the root causes and troubleshooting these issues can make all the difference. Here are the common problems bakers face with Nestlé chocolate chip cookies and tips on fixing them so you can consistently create the perfect batch every time.
Flat Cookies: How to Avoid Them
Flat cookies can be disappointing, as they spread too much and lack the desired thickness and chewiness. Fortunately, there are several ways to prevent this issue and ensure your cookies are made thick and perfectly chewy.
- Don’t Overmix the Dough: Overmixing the dough is one of the most common causes of flat cookies. When you overwork the dough, the gluten in the flour develops more than necessary, which can cause the cookies to spread too much while baking. To prevent this, mix the wet and dry ingredients just until combined. When the dough is done, you should still see streaks of flour; don’t keep mixing to achieve a smooth texture.
- Chill the Dough: Resting the dough is another key factor in preventing flat cookies. Chilling the dough for at least 30 minutes (or overnight) allows the fat (butter) to firm up. If you bake the dough right after mixing, the warm butter will cause the cookies to spread too much in the oven. Chilled dough holds its shape better, resulting in thicker cookies with the perfect chewy texture.
- Use the Right Amount of Flour: Too little flour can also cause cookies to spread too much. Ensure you measure the flour correctly by spooning it into the measuring cup and levelling it off or weighing it with a kitchen scale. Too much flour can lead to dry cookies, but too little will cause spreading.
- Check Your Baking Temperature: If your oven is too cool, the cookies spread more before they can set. Always ensure your oven is preheated to the correct temperature, and use an oven thermometer to ensure that it is not running cooler than you think. Baking at the right temperature (typically 350°F) will allow your cookies to bake evenly without excessive spreading.
- Avoid Using Too Much Baking Soda: Baking soda causes the dough to rise and spread. Using too much of it can result in overly flat cookies. Follow the recipe’s recommended measurements to avoid this problem.
Dry Cookies: The Cause and How to Fix It
Dry cookies are often the result of overbaking or an imbalance in the ingredients. Dryness can make cookies crumbly and unpleasant, so it’s essential to identify and correct the cause.
- Under- or Over-measuring the Flour: One primary cause of dry cookies is using too much flour. You will likely pack too much into your measuring cup if you measure the flour by scooping it directly from the bag or canister. This results in a dough that’s too dry, leading to overly dense or crumbly cookies. To fix this, spoon the flour into the measuring cup and level it off to ensure accuracy. Alternatively, use a kitchen scale to measure your flour more precisely.
- Add More Butter or Eggs: The dough may lack enough moisture if your cookies are dry. Butter and eggs are key moisture contributors, and adding more can help. Add an extra egg yolk, which provides more fat and moisture to the dough without affecting the structure. If you’re not ready to add a whole extra egg, consider adding a tablespoon or two of softened butter. Both will help create a softer and more moist dough, resulting in cookies with a tender and chewy texture.
- Check the Baking Time: Overbaking is one of the most common causes of dry cookies. The longer the cookies are in the oven, the more moisture they lose. Always continue baking time and remove the cookies immediately. If u sure, it’s better to underbake slightly than overbake, as the cookies will continue to bake on the sheet once removed from the oven.
- Don’t Skip the Chilling Step. If you skip chilling the dough or don’t chill it long enough, it will spread too thin while baking, leading to dry cookies. Chilling the dough helps the butter firm up, preventing the dough from spreading too much and losing moisture during baking.
Uneven Baking: Tips to Ensure Uniformity in Your Cookies
Uneven baking is a frustrating problem, as it results in cookies that are inconsistently cooked. Some cookies may be overdone, while others remain raw, affecting texture and flavour. There are several ways to ensure your cookies bake uniformly.
- Rotate the Baking Sheet: One of the simplest ways to ensure even baking is to rotate the baking sheet halfway through the baking time. Ovens can have hot spots, where certain areas bake faster than others. By rotating the sheet, you help ensure that all your cookies bake at the same rate, resulting in uniform texture and colour.
- Use the Right Bakeware: The type of bakeware you use can impact how evenly your cookies bake. Light-coloured baking sheets are best for cookies; they reflect heat and prevent the bottoms from quickly browning. Dark-coloured baking sheets absorb more heat, which can cause the bottoms of your cookies to brown too much before the rest of the cookies are baked.
- Don’t Overcrowd the Baking Sheet: If you place too many cookie dough balls on a baking sheet, the cookies will have less space to spread and may bake unevenly. Leave enough space between the dough balls—typically about 2 inches—so the cookies can bake evenly and spread as needed. If your batch is large, it’s better to bake the cookies in two separate rounds rather than overcrowding the sheet.
- Use Multiple Racks: If baking a large batch of cookies, you may be tempted to load multiple trays into the oven simultaneously. However, this can cause uneven baking. Use one rack at a time for the most even heat distribution. If you must use multiple racks, rotate the sheets halfway through baking to ensure the cookies on both racks bake evenly.
- Allow the Oven to Preheat: Never place cookies in an oven that hasn’t fully preheated. An oven still heating up can lead to uneven baking, with some cookies overcooked while others remain undone. Wait until your oven reaches the desired temperature before putting the cookies in.
Variations and Fun Add-ins for Your Nestlé Chocolate Chip Cookies
Who says your Nestlé chocolate chip cookies must be just chocolate chips and dough? Those cookies are delicious, but why not take your baking game to the next level with fun variations and add-ins? Imagine a cookie that combines your favourite ingredients into a sweet, chewy masterpiece. Whether you’re a classic cookie lover or an adventurous baker, there are endless possibilities to customize your cookies and surprise your taste buds. Here are some of our favourite ways to mix things up and create even more irresistible treats!
Add Nuts: Walnuts or Pecans for That Perfect Crunch
Nuts are an excellent way to add texture and flavour to Nestlé chocolate chip cookies. The richness of the chocolate pairs beautifully with the crunchy, earthy taste of nuts. But which nuts should you choose?
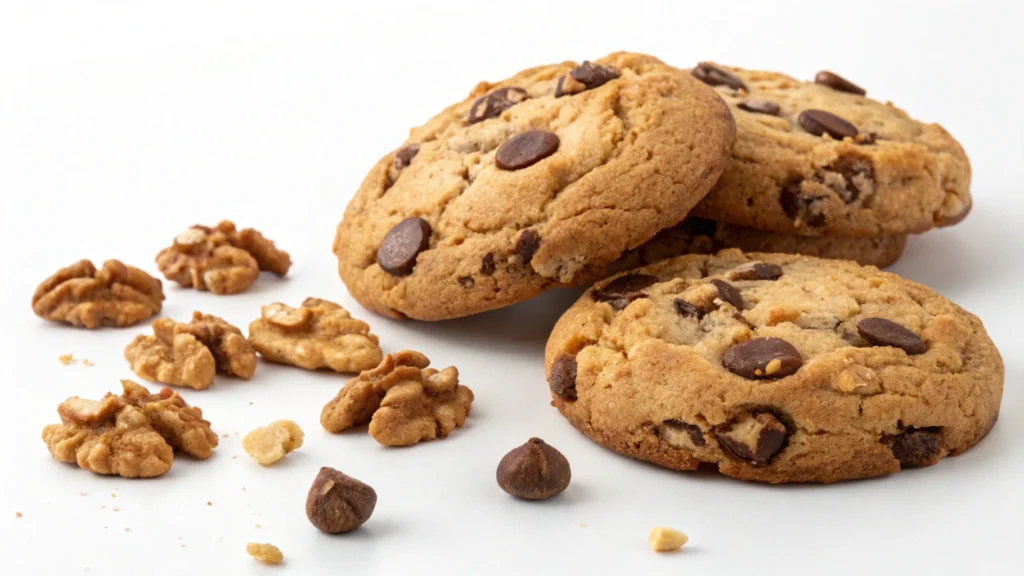
- Walnuts: Walnuts are a classic addition to chocolate chip cookies. Their slightly bitter flavour balances out the sweetness of the chocolate, creating a sophisticated taste that elevates the cookie experience. Plus, they add a satisfying crunch with every bite!
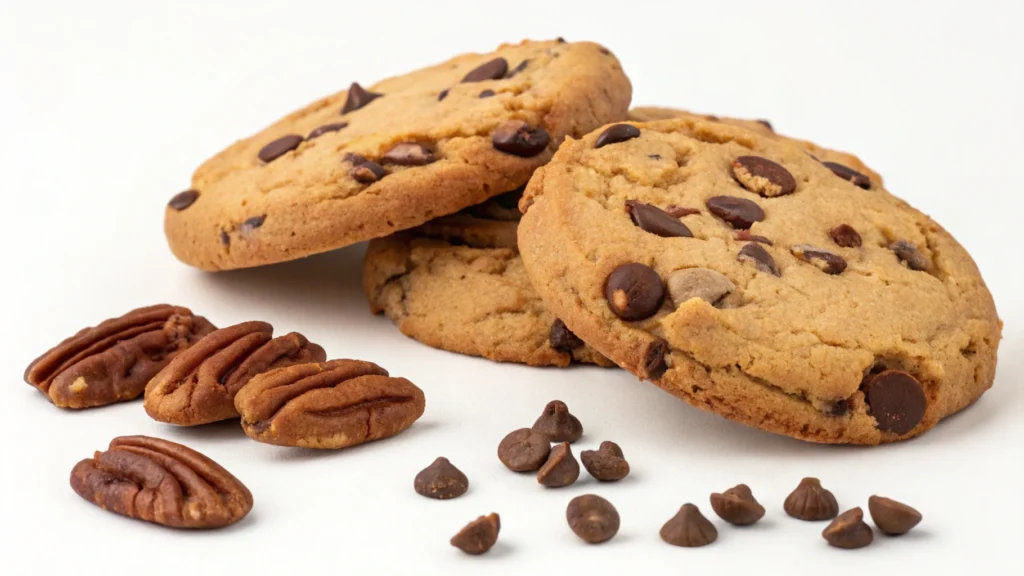
- Pecans: Pecans are your go-to choice after a nuttier, slightly buttery taste. Their delicate, rich flavour beautifully complements chocolate chips. Chopped pecans blend well into the dough, adding flavour and crunch without overpowering the chocolate.
Want to make it even more exciting? Combine walnuts and pecans for a truly irresistible double-nut experience!
Double Chocolate: Use Cocoa Powder or Extra Chocolate Chips for a Richer Cookie
Why not go double chocolate for those who can never get enough chocolate? Adding more chocolate to your dough transforms classic Nestlé chocolate chip cookies into a more prosperous, decadent treat. Here are two ways to do it:
- Cocoa Powder: Add a few tablespoons of unsweetened cocoa powder to the dry ingredients. This will give your cookies a darker, deeper chocolate flavour and a slightly denser texture. The cocoa powder infuses every bite with an intense chocolatey goodness that will satisfy even the most serious chocolate lovers.
- Extra Chocolate Chips: Want to elevate your dessert even further? Add a generous handful of extra chocolate chips to your dough. You can even mix different chocolate chips—semi-sweet, dark, or milk chocolate—for various flavours and textures in every bite. Double the chocolate means double the indulgence!
Double chocolate cookies are perfect for satisfying chocolate cravings in the most luxurious way.
Other Fun Add-ins: M&Ms, Caramel Bits, and Sea Salt for a Unique Twist
If you want to experiment and add a surprising twist to your Nestlé chocolate chip cookies, consider mixing some fun and unique ingredients. These unexpected add-ins can create exciting flavour profiles that will keep everyone returning for more. Here are a few to try:
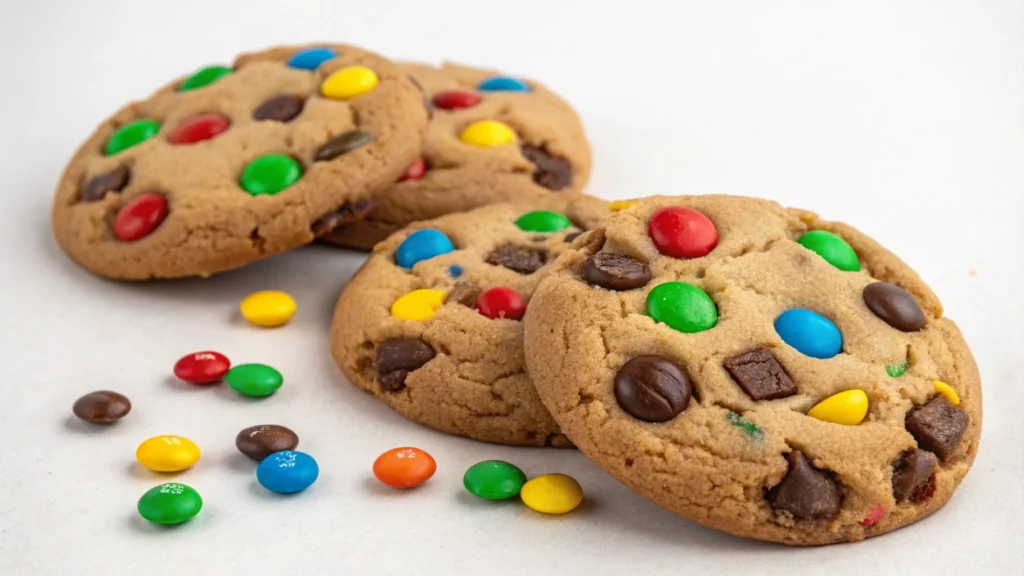
- M&Ms: Who doesn’t love the colourful pop of M&Ms? These little candy-coated gems add colour and a sweet crunch to your cookies. Whether you choose the classic milk chocolate M&Ms or peanut butter-filled ones, M&Ms add a fun, playful touch that turns a simple cookie into a treat everyone will love.
- Caramel Bits: If you like chewy, gooey sweetness, caramel bits are an excellent addition. These bite-sized caramel pieces melt beautifully inside the cookies, giving each bite a deliciously rich, buttery flavour. The combination of chocolate and caramel is an undeniable crowd-pleaser!
- Sea Salt: Looking for a sophisticated twist on your cookies? Sea salt is the answer. A light sprinkle of sea salt on top of your freshly baked cookies can help enhance the sweetness of the chocolate while providing a surprising contrast that takes your cookies to the next level. The salty-sweet combination is a gourmet touch you’ll love!
- Toffee Bits: For a more profound, rich flavour, toffee bits melt into the dough, adding a buttery, caramelized sweetness. These little bits of heaven add a crunchy texture and a rich, burnt sugar flavour that pairs perfectly with chocolate chips.
Customize to Your Heart’s Content
The beauty of baking is that it allows you to get creative and customize recipes. Don’t be afraid to mix and match ingredients based on your preferences or what you have in the pantry. Add more of your favourite treats, or try something new! This flexibility makes your Nestlé chocolate chip cookie recipe a blank canvas for endless delicious possibilities.
Remember, every variation you try will change the texture and flavour of your cookies, so don’t be afraid to experiment and see what works best for you. Each add-in brings something unique, creating new textures and flavours that take your cookies from ordinary to extraordinary.
So, the next time you’re ready to bake, why not try one or more of these fun cookie variations? Whether craving a nutty crunch, a double dose of chocolate, or a surprising twist with caramel or M&Ms, your Nestlé chocolate chip cookies will never be the same again. Let your creativity shine in the kitchen, and most importantly, enjoy every sweet bite!
Conclusion: Time to Bake and Enjoy the Best Nestlé Chocolate Chip Cookies!
This is everything you need to create the best Nestlé chocolate chip cookies; everyone asks for seconds! From simple, high-quality ingredients like Nestlé chocolate chips, butter, and sugar to the essential step-by-step guide that walks you through every detail of the process, this recipe is designed for beginners and seasoned bakers alike. We’ve even shared some extra tips and tricks to help you bake those perfect chewy, soft cookies every time.
But here’s the best part: you don’t have to stop at the basics! As we’ve explored, there are many fun variations – from adding crunchy walnuts or pecans for a nutty touch to going all-out with double chocolate cookies or unique add-ins like M&Ms, caramel bits, and sea salt. The possibilities are endless, so why not get creative and make this recipe your own? Whether you prefer a traditional take or love experimenting with new ingredients, this recipe is the perfect foundation for all your cookie-baking adventures.
Now that you have all the tools and knowledge to create mouth-watering cookies, it’s time to get baking! I’d love to hear how your cookies turn out, so feel free to share your results. Did you stick to the classic recipe or add your twist? Did your cookies come out soft and chewy, or did you go for a crispier texture? Your feedback and experiences are always welcome—it’s how we learn from each other and make our baking even better.
Baking should be fun and rewarding, so don’t be afraid to get creative, try different variations, and even make a few mistakes. After all, the beauty of baking lies in the joy of creating something delicious with your own two hands. So grab your mixing bowls, preheat that oven, and prepare to enjoy the very best Nestlé chocolate chip cookies you’ve ever made. Happy baking, and enjoy every chewy, chocolate-filled bite!
FAQs About Nestlé Chocolate Chip Cookies
1. What makes Nestlé chocolate chip cookies so unique?
Nestlé chocolate chip cookies are iconic because of their perfect balance of flavours and textures. The combination of semi-sweet chocolate chips, a soft and chewy centre, and slightly crisp edges makes them irresistible. Plus, the recipe is simple and easy to follow, even for beginners.
2. Can I use a different type of chocolate instead of Nestlé Toll House chocolate chips?
Absolutely! While Nestlé Toll House chocolate chips are a classic choice for their rich flavour and perfect melting properties, you can experiment with dark chocolate, milk chocolate, or even white chocolate chips. You can also try mixing in chopped chocolate bars for a rustic touch.
3. How can I make my cookies softer and chewier?
For softer, chewier cookies:
- Use more brown sugar than white sugar for added moisture.
- Don’t overmix the dough; this can overdevelop the gluten.
- Chill the dough before baking to help the cookies hold their shape.
- Remove the cookies from the oven when the edges are set, but the centres are still soft.
4. Do I need to chill the dough?
Chilling the dough is highly recommended! It allows the butter to solidify, which prevents the cookies from spreading too much in the oven. Additionally, it gives the flour time to hydrate fully and enhances the flavours of the dough.
5. Can I freeze Nestlé chocolate chip cookie dough?
Yes, cookie dough freezes beautifully! Scoop the dough into balls and place them on a baking sheet to freeze. Once firm, transfer the dough balls to a freezer-safe bag or container. When ready to bake, place the frozen dough on a baking sheet and add a minute or two to the baking time.
6. Why did my cookies come out flat?
Flat cookies are often caused by:
- Warm dough that wasn’t chilled.
- Using too little flour.
- Overmixing the dough.
- Butter that was too soft or melted.
To fix this, chill the dough, measure your ingredients carefully, and avoid overmixing.
7. Can I substitute margarine for butter in the recipe?
While you can use margarine, butter is recommended for the best flavour and texture. Margarine contains more water, which can affect how the cookies bake, potentially making them less rich and slightly softer.
8. How do I store Nestlé chocolate chip cookies to keep them fresh?
Store cookies in an airtight container at room temperature for up to a week. Add a slice of bread to the container to keep it soft – the bread helps retain moisture. For more extended storage, freeze the cookies and thaw them as needed.
9. What can I add to the cookie dough for a fun twist?
There are endless possibilities for customizing your cookies! Popular add-ins include:
- Nuts like walnuts or pecans.
- M&Ms or other candy-coated chocolates.
- Caramel bits or toffee pieces.
- A sprinkle of sea salt on top for a sweet-salty contrast.
10. How do I ensure my cookies bake evenly?
To bake evenly:
- Use parchment paper or a silicone baking mat on your cookie sheet.
- Space the dough balls evenly, leaving about 2 inches between them.
- Rotate the baking sheet halfway through the baking time.
- Avoid overcrowding the oven by baking one tray at a time.
These tips will help you achieve consistently perfect cookies every time!
Have you tried our Recipe ?
There are no reviews yet. Be the first one to write one.


1 thought on “The Best Nestlé Chocolate Chip Cookies Recipe You’ll Love”
Comments are closed.